If you disassemble a Kodak panoramic single use camera, you
will find that it has a fixed aperture of f12. Make sure to practice
on an unloaded camera to get familiar
with parts and operation.
List of materials
1 Kodak Max Panoramic camera Cat # 8258410
2" x 2 " square piece of 0.010 sheet styrene
1 drill bit #80 or smaller
diagonal cutters
knife
screwdriver
small screw for takeup reel.
stainless steel wire for shutter control
Kodak Gold 100 ASA film 24 exp. limit. Camera will not hold 36 exp.
Scrap wood for tripod mount / inexpensive tripod is mandatory.
Light meter for exposure times.
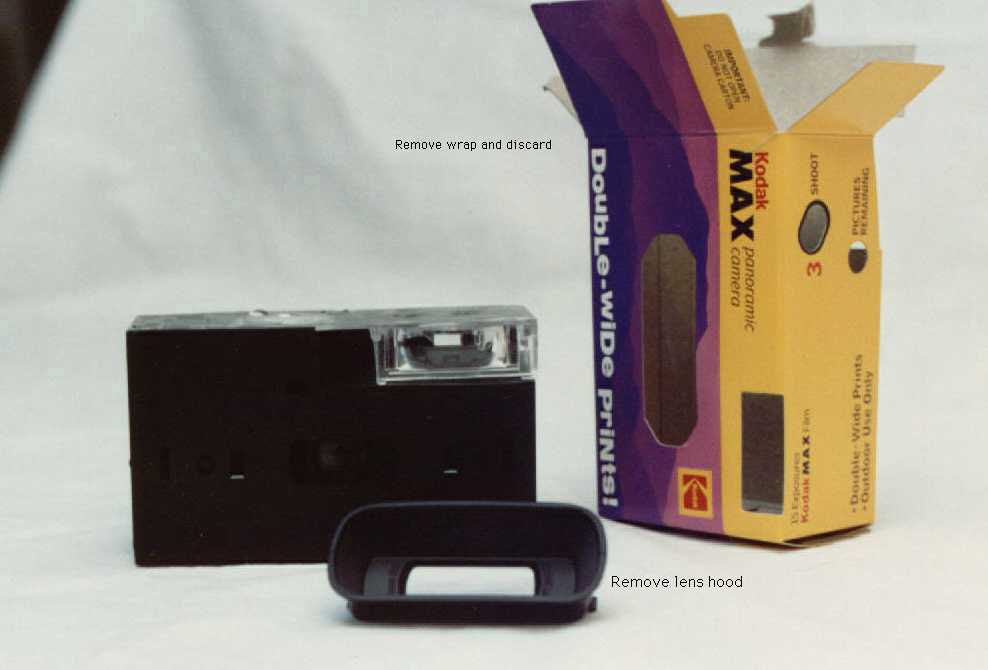
Step 1
Remove cardboard wrap. See photo 1A
Do not use tools to remove any camera part.
All are snap on pieces. Be gentle on plastic parts, tabs can break
off.
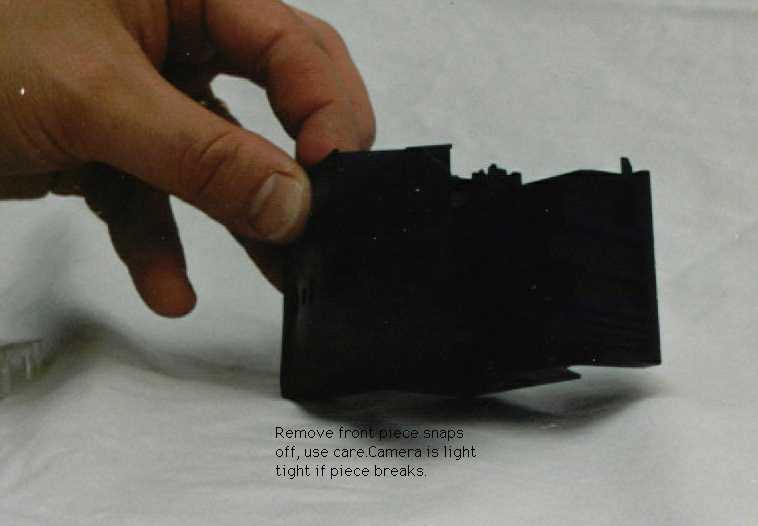
Step 2
Remove front of camera. Snaps off. See photo 2A
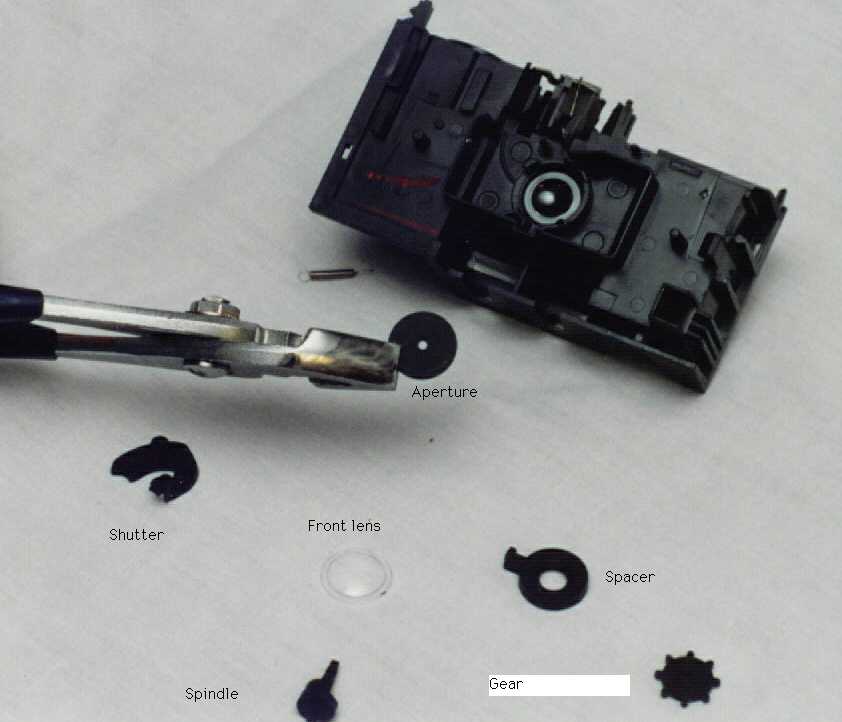
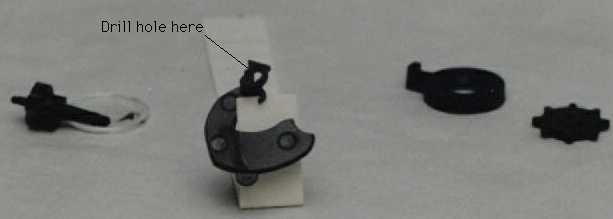
Remove lens, spacer, shutter, spring, and diaphragm. photo 2B
Drill hole with microbit in sheet plastic.
Lightly sand before painting flat black.The hole is 0.3 mm.
Center hole and superglue to existing aperture piece.
Trim excess plastic around old diaphragm circle.
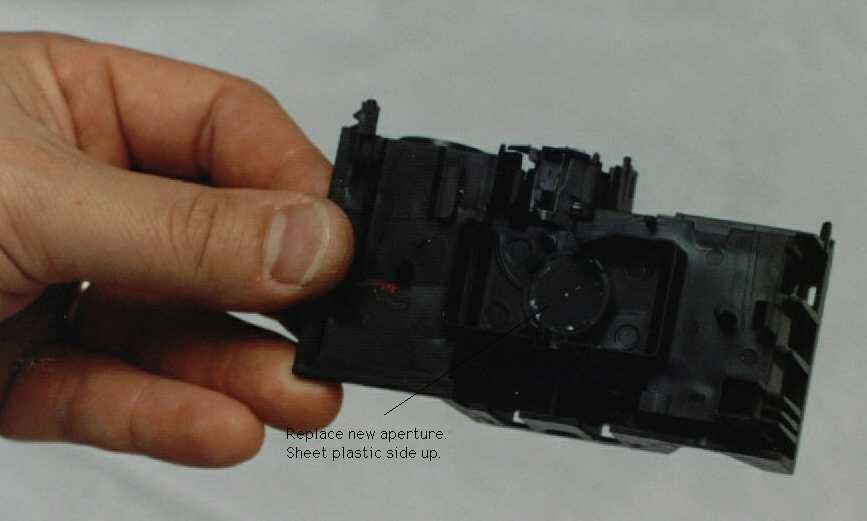
Replace new aperture (diaphragm). Sheet plastic side up, shutter will
bind if not installed correctly. photo 2C.
Step 3
Drill hole in shutter arm. See photo 3A
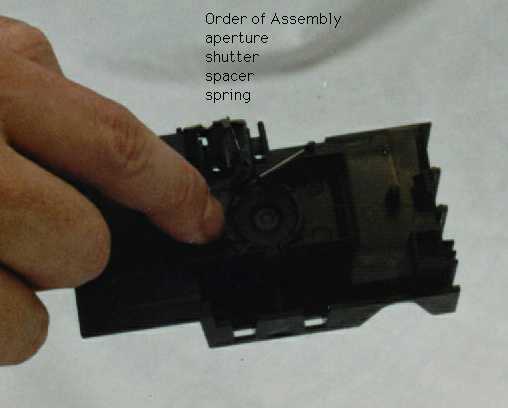
Replace shutter, spacer, and spring . See photo 3B
Replace front lens. See photo 3C.
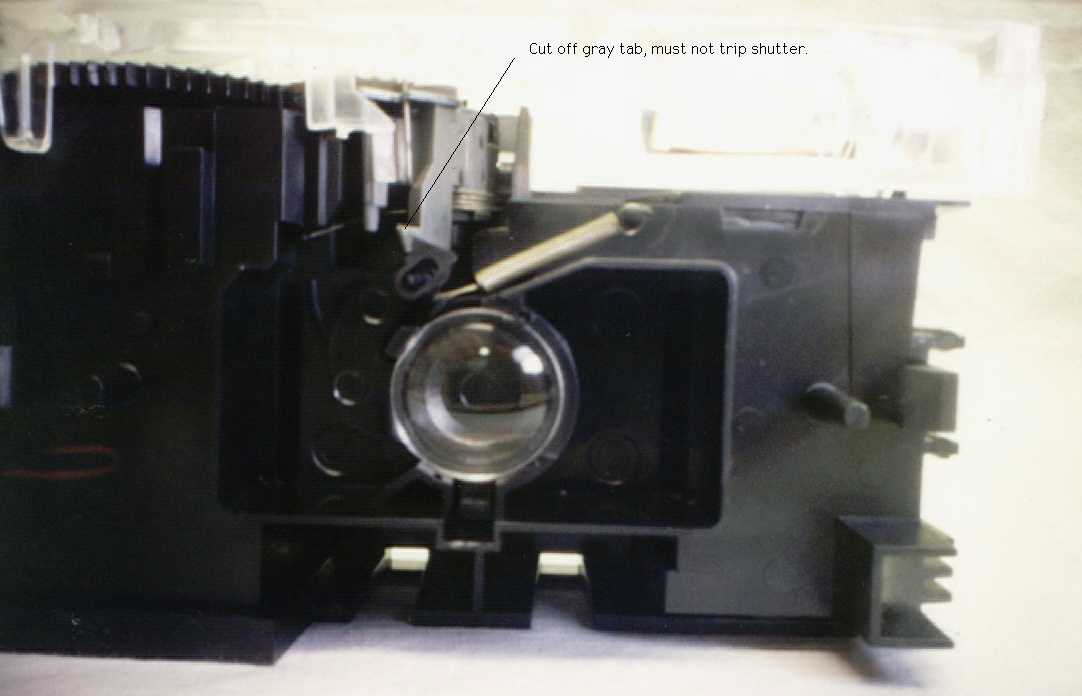
Cut trip arm with diagonal cutters so shutter does not trip when
button is pressed. Test shutter to make sure it does not trip.
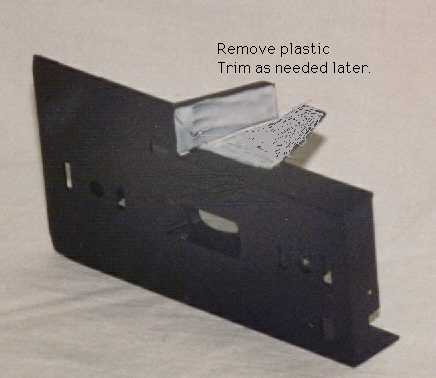
Trim front piece as indicated by photos. Cut away white sections.
See photo 3D
Replace camera front. Camera is light tight without it, but this piece
protects the lens from damage.
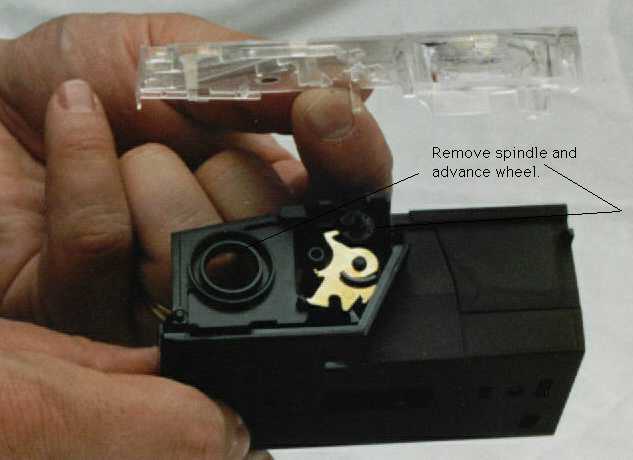
Step 4
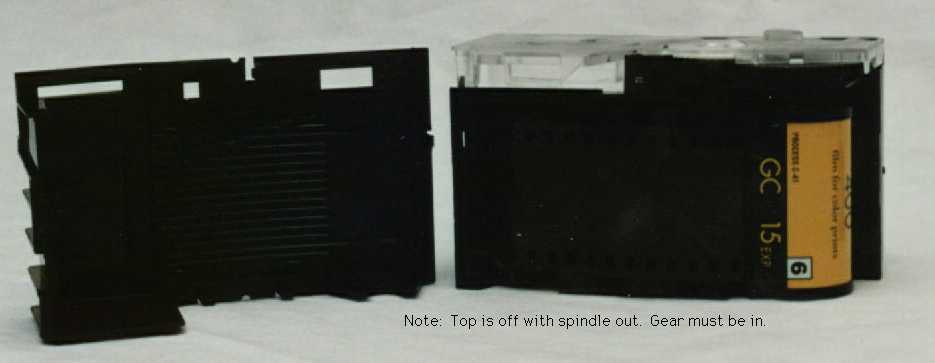
Remove clear top. See 4A
Remove spindle and advance wheel See 4 A,4B
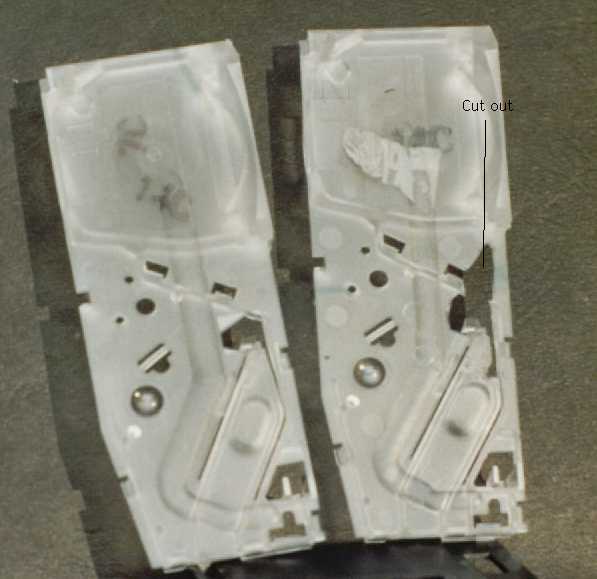
Cut slot in clear top so shutter trip wire can move freely. See 4 C
Important: Skip to step 7 and test shutter trip wire. See photos 7A
and 7B. Some minor trimming of front piece and top will be needed
to ensure smooth movement.
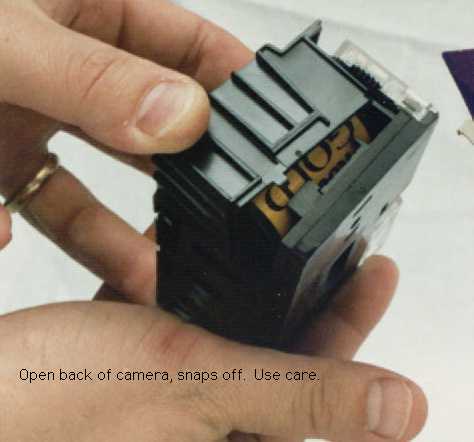
Step 5 Film loading
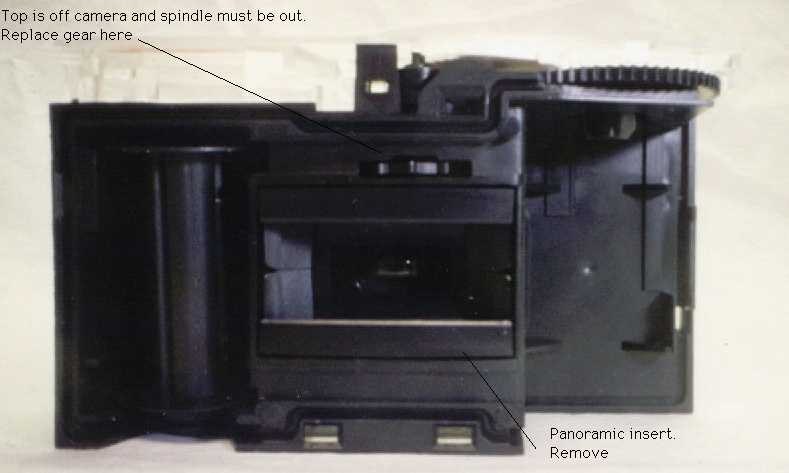
Open back gently and toss preloaded exposed film. 5A
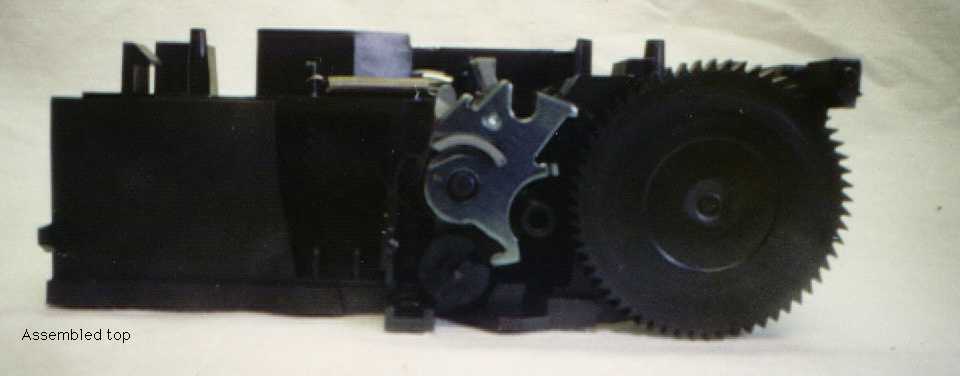
Remove rectangular panoramic formatting box and replace
gear. 5 B
Note: if you want panoramic prints the box must be inserted.
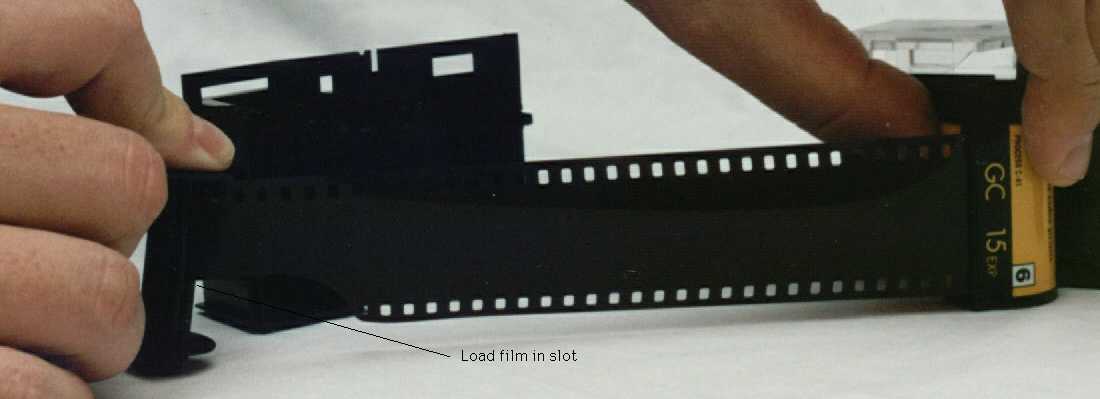
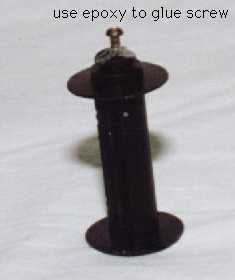
Plastic is soft and strips easily so mount small screw onto reel. 5C
Load leader onto reel. Seats on notch inside groove. 5D
Place reel back and seat cannister in rightside compartment. Keep
film flat and tight. See photo 5E
Close back from right to left carefully try not to snap off
pins/mounts.
Use screwdriver to wind film onto reel. Wait for tension at end of
film. Counterclockwise turn of screw.
Put spindle and advance film wheel in.
Seat top and advance film until shutter locks. Has a few turns before
it locks shutter.
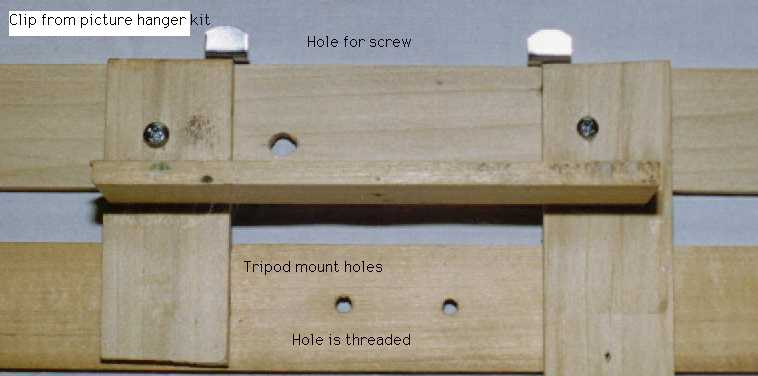
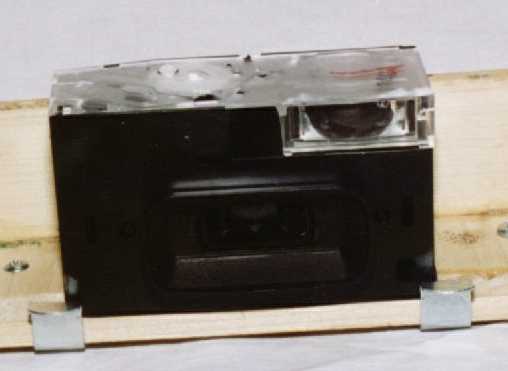
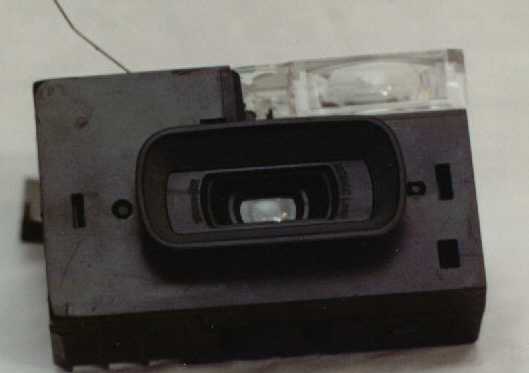
Step 6
Tripod mount
Cut inexpensive wood to make mount.
See photos 6A, 6B, 6C for picture of mount and tripod.
Step 7 Taking Pictures
Place wire in the hole drilled in the shutter arm. See 7A
Move wire to open shutter release at desired exposure time. See 7 B.
Around 5 secs at 100 ASA on sunny days.
30 sec plus for inside shots.
Can use off camera flash with wide angle diffuser panel for better
indoor pictures.
Push button to release disabled shutter and advance film.
When the film is all exposed, shutter will not lock. Mentally keep
track of remaining exposures.
Remove back and return film to processor.